Easily create your portfolio with Jekyll and GitHub Pages
Easily create your portfolio with Jekyll and GitHub Pages
If you’re looking for a job, especially if you are starting your professional career, then you want to show off your skills and the projects you worked on through a portfolio [1]. Recruiters want and need to understand that you have hands-on experience and maybe also give a look at which frameworks you used in the past. There are many different things you may want to highlight in your portfolio [2], but my example is project-focused.
The tools we’ll use
To set up your next awesome portfolio, we’re going to use GitHub Pages, a free platform for hosting static websites, and Jekyll, a framework for generating static websites. All you need to know is some basic Markdown knowledge (which is quite easy to learn, see this guide). I will also assume you are on a Linux machine.
Setting up your GitHub repository
GitHub Pages is based on GitHub repositories. This means that you will need a GitHub account to publish your portfolio online.
Your website will have address https://<your-username>.github.io/ (you can change this, but I will not cover how to do it in this guide. If you’re interested, look here). Keep this in mind if you don’t have a GitHub account and you need to create one for the purpose.
After logging in to your (maybe new) GitHub account, create a new repository (top right bottom next to your profile picture -> New repository) and name it <your-username>.github.io, then Create repository.
Installing Ruby and Jekyll
To deploy your website, you need to install Jekyll, a Ruby framework. We will also need a specific version of Ruby, as Jekyll may not be compatible with the most recent one. For this reason, I suggest you install rbenv, which incredibly simplifies this process, by following this guide.
Also, to download specific ruby versions for rbenv, we need to install ruby-build. Refer again to the official documentation for that.
At the time of writing (September 2021) Jekyll is not compatible with ruby3: we will need ruby2.7. We first need to see the most recent version of ruby2.7:
1 | $ rbenv install -l |
In our case, we need to install the 2.7.4. To do so, just run
1 | $ rbenv install 2.7.4 |
More generally, check the official documentation for information about possible incompatibilities: rbenv is here for solving any trouble you may find along the way.
We can now select the environment we just installed through rbenv
1 | $ rbenv local 2.7.4 |
and finally, install jekyll
1 | $ gem install jekyll bundler |
Choosing a theme and deploying
Jekyll is a widely used framework: you will find plenty of resources, themes and documentation for it. That’s also the case for portfolio websites: this page contains a list of free and non-free themes for building your next portfolio. Among these, I decided to use Phantom, so make sure to replace the GitHub URL of your theme in the next commands.
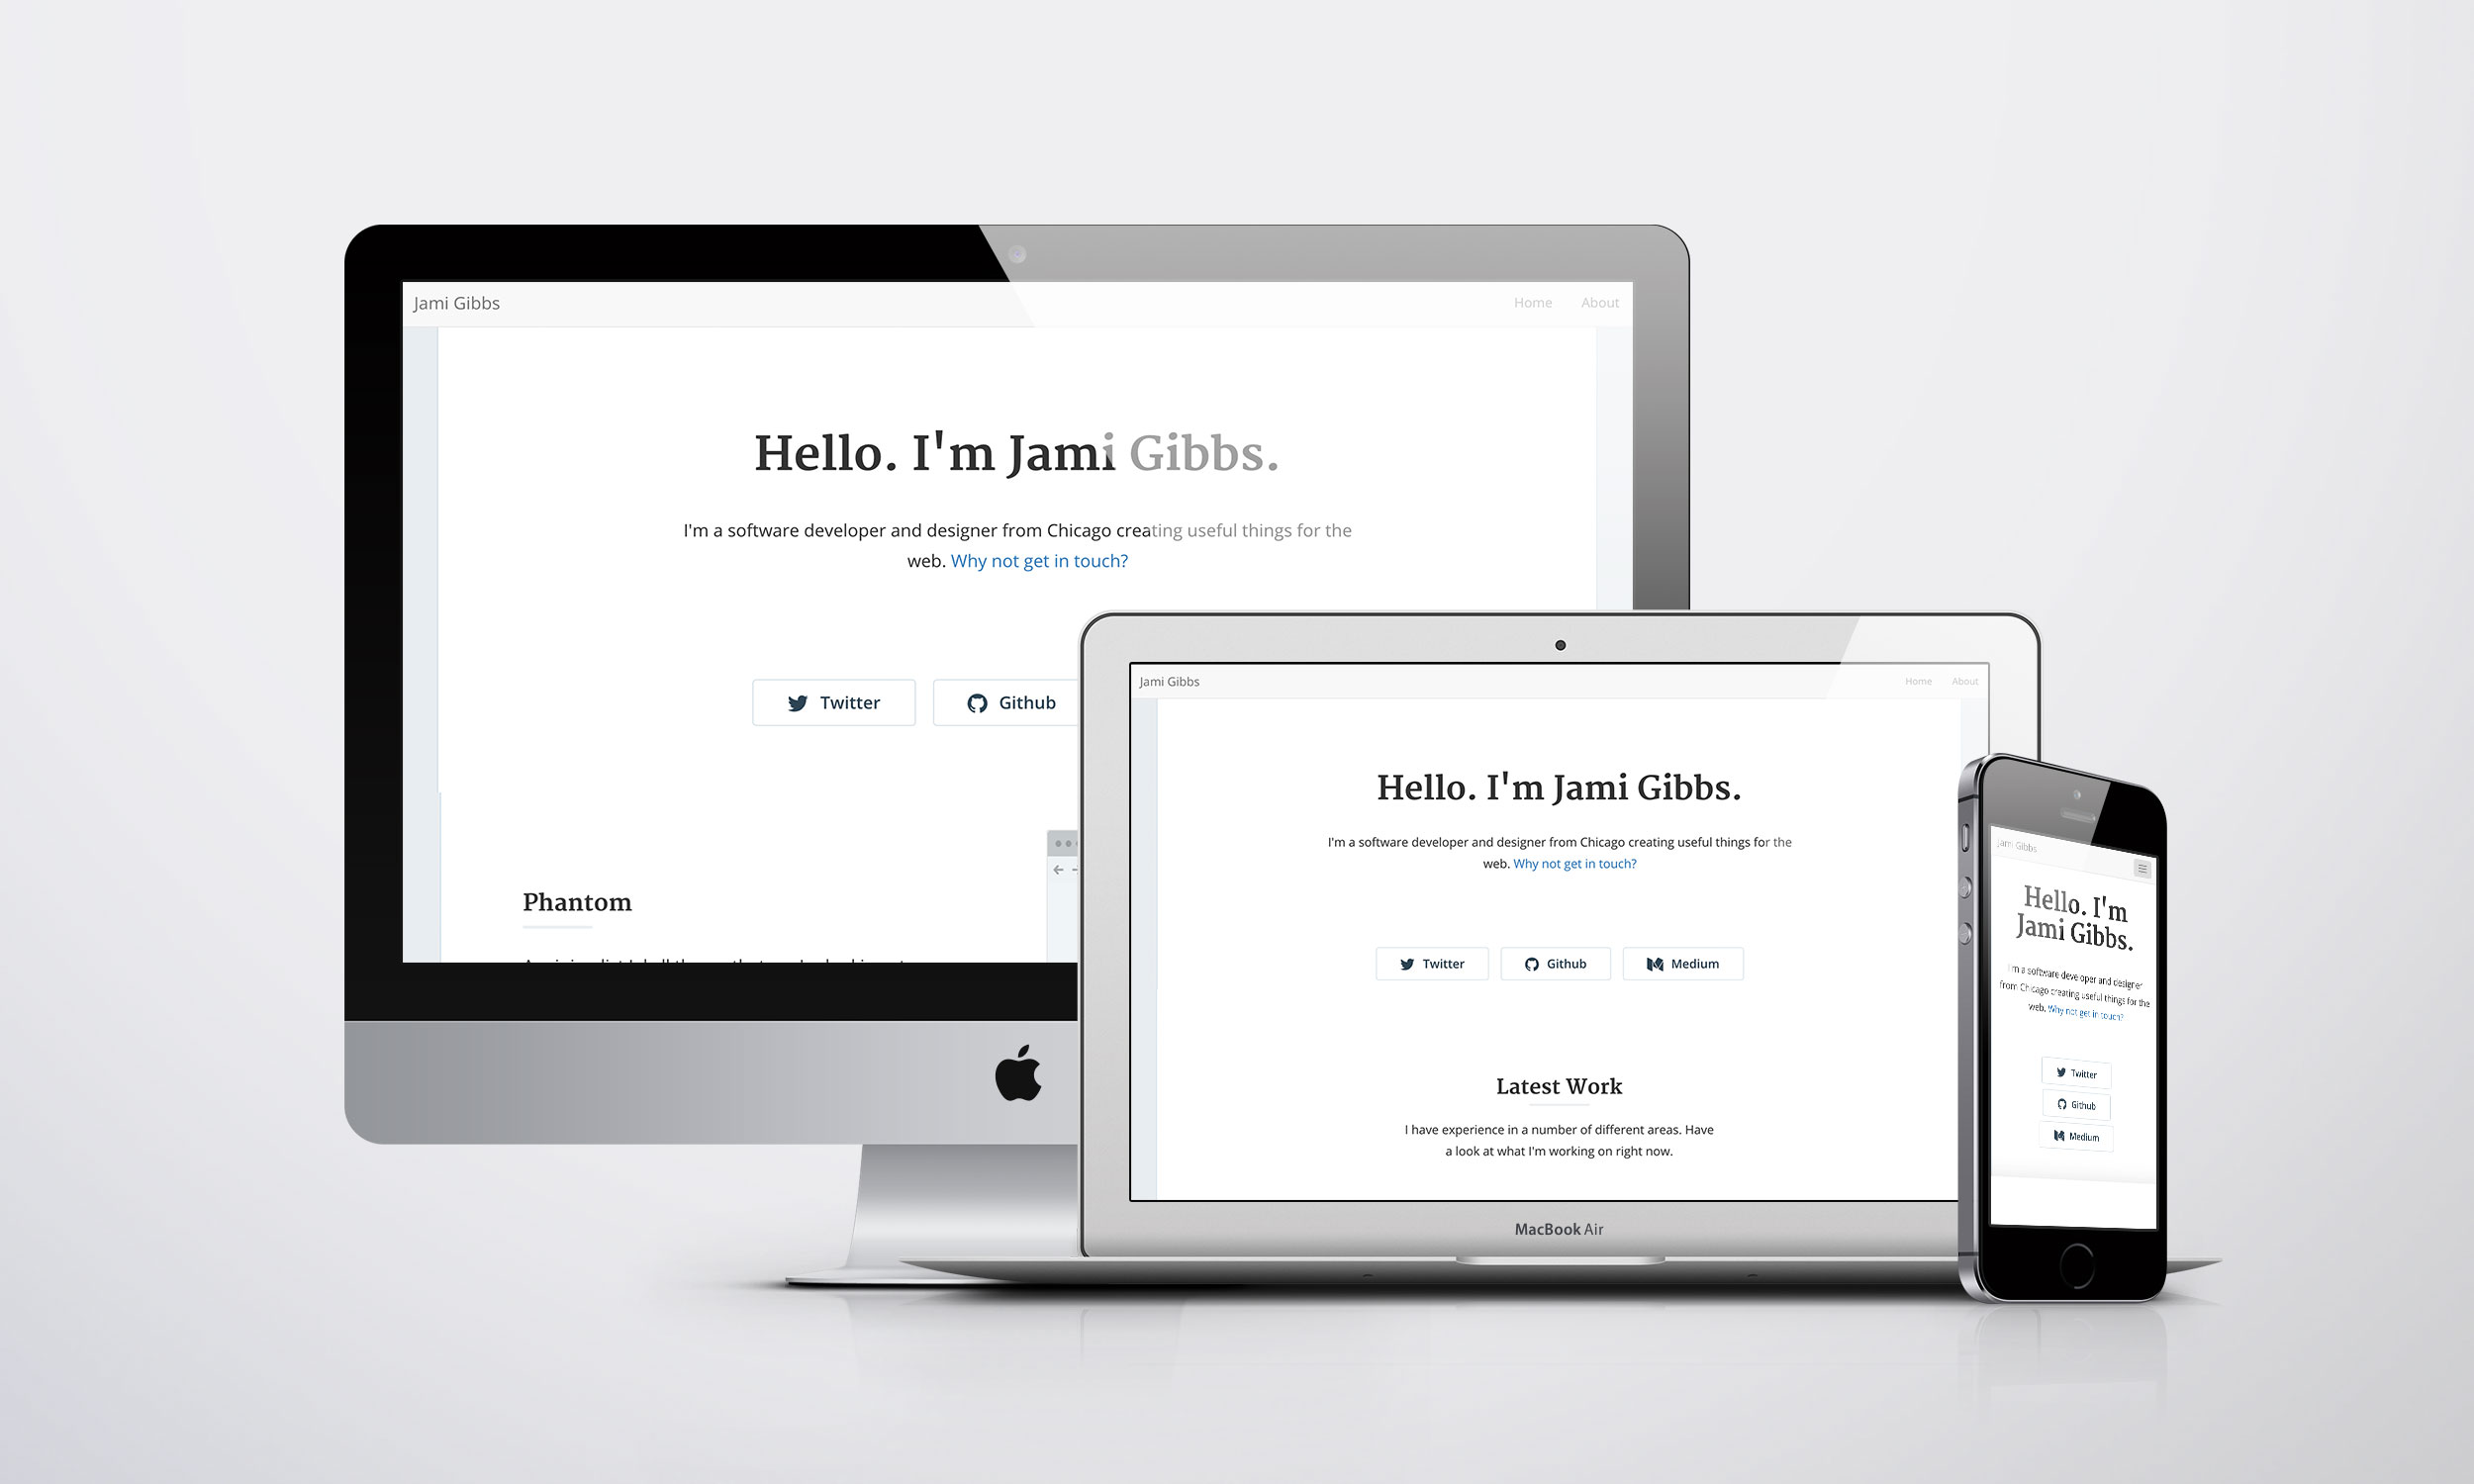
Preview of the Jekyll Phantom theme
What you need to do now is
Cloning the repository of your Jekyll theme and moving to it
1
$ git clone git@github.com:jamigibbs/phantom.git && cd phantom
Install dependencies of the project
1
$ bundle install
Update the URL of the remote repository
1
2
$ git remote remove origin
$ git remote add origin git@github.com:<your-username>/<your-username>.github.io.gitUpdating the Jekyll configuration: edit the
_config.ymlin the folder you cloned and add your info (you can find all the details in the comments of the file).Edit the contents/posts of the website in
_postsand, if you need, add any more following the same structure.Test your website locally (it will provide you with a local URL where you can preview your website before deploying it)
1
$ bundle exec jekyll serve
Once you’re ready, commit everything and push it to GitHub
1
$ git add * && git commit -m <your-commit-message>
Head over to the repository you created, i.e.
https://github.com/<your-username>/<your-username>.github.ioand open the Settings tab, then Pages. Now, in the Source section, press on None and select the Master/Main branch and then / (root) (if not already selected). Then, save.
That’s it! Now, if you open <your-username>/github.io you will be able to see your awesome portfolio!
Here‘s what mine looks like!
If you found this article interesting follow me on Github!